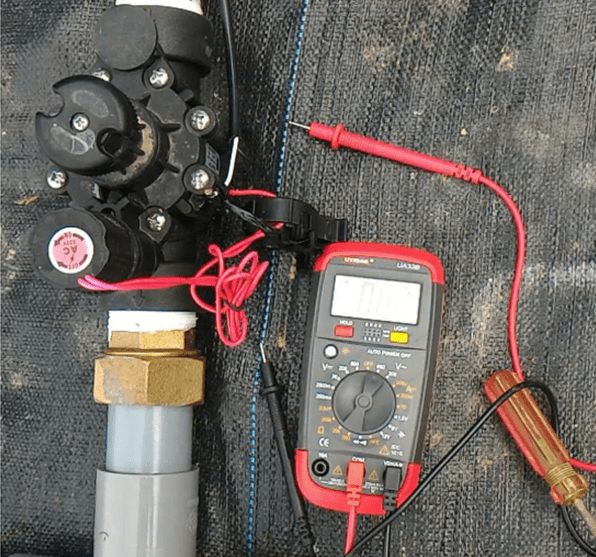
Maintaining your sprinkler system is crucial for keeping your lawn lush and green. One common issue that arises is a faulty solenoid in the sprinkler valve. A solenoid controls the flow of water into the sprinkler heads, and when it malfunctions, it can disrupt the entire irrigation process. Fear not! Replacing a sprinkler valve solenoid (irrigation valve solenoid) is a manageable task that can save you time and money. In this comprehensive guide, we'll walk you through the steps to replace a sprinkler valve solenoid, ensuring your system continues to keep your lawn looking its best.
1. Sprinkler Valve Solenoid Replacement: a Step-by-Step Guide
1.1 Step 1: Gather Your Materials
Before you begin, gather all the necessary tools and materials:
● New solenoid compatible with your sprinkler valve model
● Screwdriver
● Adjustable wrench
● Wire stripper/cutter
● Waterproof wire connectors
● Teflon tape
● Pipe wrench (optional, depending on your valve type)

1.2 Step 2: Turn off the Water Supply
Locate the main water supply to your irrigation system and shut it off. This ensures no water is flowing through the pipes while you work, preventing any potential accidents or water damage.
1.3 Step 3: Identify the Problem Valve
If you haven't already done so, identify the specific valve with the faulty solenoid. This valve may be leaking water or failing to activate properly when the system is running.
1.4 Step 4: Remove the Old Solenoid
Using a screwdriver, carefully remove the screws securing the solenoid to the top of the valve. Once the screws are removed, gently lift the old solenoid off the valve body. Be cautious not to damage any surrounding components during this process.
1.5 Step 5: Prepare the New Solenoid
Before installing the new solenoid, apply Teflon tape to the threads to ensure a watertight seal. This step is essential for preventing any leaks once the solenoid is in place.

1.6 Step 6: Install the New Solenoid
Carefully place the new solenoid onto the valve body, aligning it with the screw holes. Once in position, use the screws you removed earlier to secure the solenoid in place. Ensure the solenoid is firmly attached but avoid over-tightening the screws, as this could cause damage.
1.7 Step 7: Connect the Wires
Using a wire stripper/cutter, carefully strip the insulation from the wires protruding from the solenoid and the valve's wiring harness. Once stripped, twist the corresponding wires together securely. For added protection against moisture, use waterproof wire connectors to seal the connections.
1.8 Step 8: Test the Solenoid
With the new solenoid installed and the wiring connected, turn the water supply back on and activate the irrigation system. Check the valve for any leaks or irregularities in operation. If everything looks and functions as it should, congratulations! You've successfully replaced the sprinkler valve solenoid.

1.9 Step 9: Adjust as Necessary
If the valve is not functioning correctly after installation, double-check the connections and ensure the solenoid is properly seated. You may need to adjust the wiring or reposition the solenoid to ensure proper function.
1.10 Step 10: Perform Routine Maintenance
To extend the life of your sprinkler system and prevent future issues, perform routine maintenance, such as checking for leaks, cleaning filters, and adjusting sprinkler heads as needed. Regular inspections and upkeep will help keep your irrigation system running smoothly for years to come.
2. FAQs about Sprinkler Solenoid Valve
2.1 How Do I Know if My Sprinkler Solenoid Is Bad?
A malfunctioning sprinkler solenoid may exhibit several signs, including:
★Failure to turn on or off: If the sprinkler valve doesn't activate or deactivate as expected, it could indicate a faulty solenoid.
★Continuous leaking: Water leaking from the valve even when the system is off is a common indicator of a bad solenoid.
★Inconsistent watering: Uneven watering or zones not operating properly could be due to a malfunctioning solenoid.
★Audible clicking or buzzing: Strange noises coming from the valve box may suggest solenoid issues.
If you notice any of these signs, it's advisable to inspect and potentially replace the solenoid.

2.2 How Much Does It Cost to Replace a Solenoid on a Sprinkler System?
The cost to replace a solenoid on a sprinkler system can vary depending on factors such as the type of solenoid, the brand of the sprinkler system, and whether you hire a professional or do it yourself. On average, the cost of a solenoid ranges from $10 to $30.
If you hire a professional to replace it, you may incur additional labor costs, which can range from $50 to $150 per hour. Overall, DIY replacement is generally more cost-effective, but it's essential to factor in the potential cost of tools and materials.
2.3 How Often Do Sprinkler Solenoids Need to Be Replaced?
The lifespan of sprinkler solenoids varies depending on factors such as usage, quality of the solenoid, and environmental conditions. Generally, a well-maintained solenoid can last anywhere from 5 to 10 years or more.
However, factors like water quality, exposure to extreme temperatures, and regular maintenance practices can affect longevity. Regular inspection of the solenoids as part of your sprinkler system maintenance routine can help identify any signs of wear or malfunction, allowing for timely replacement as needed.
3. Conclusion
Replacing a sprinkler valve solenoid may seem daunting at first, but with the right tools and a methodical approach, it's a task that any DIY enthusiast can tackle. By following these step-by-step instructions, you can restore proper functionality to your sprinkler system and ensure your lawn stays healthy and vibrant.
Remember, regular maintenance is key to preventing future issues, so don't forget to schedule routine inspections and upkeep to keep your irrigation system in top condition.


